Whiskey-Wine Stand
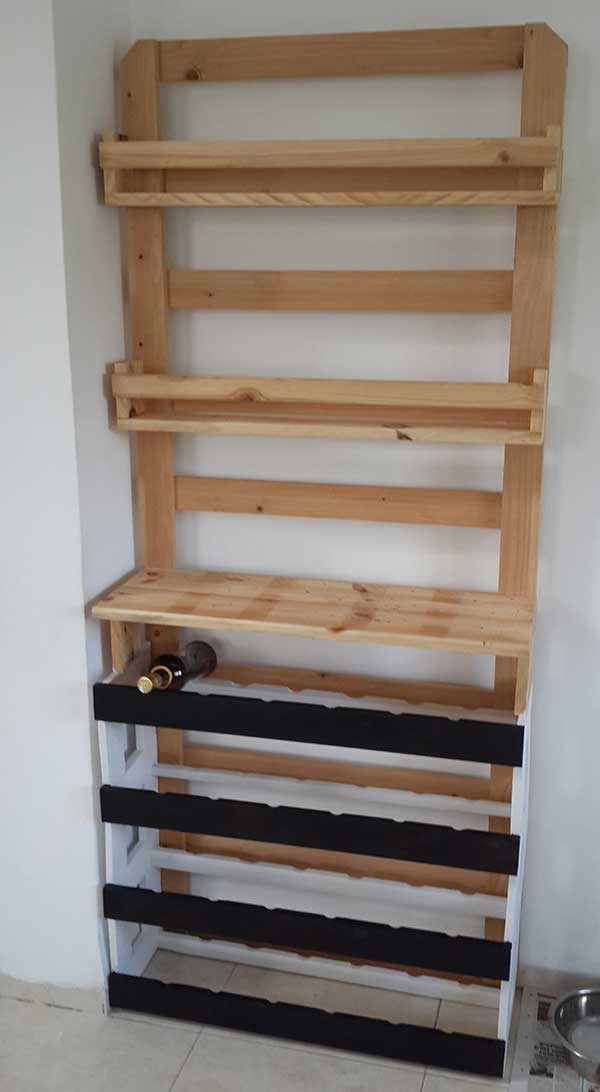
The idea came to me when I was looking to create something useful to my brother new place, as he loves whiskey and wine, I have come up with the idea that will combine both and allow a space to put glasses on it and poure the whiskey/wine.
Each part of the stand (the wine bottles holder and the whiskey bottle holder) can be seperated and be used individually as I never been in his new place so I did not know how it will look like and how he will want to use it.Unfortunately I dont have pictures of while creating it, so I will try to describe the process as much as I can.
Time:
I cannot remember how long it toke me to do as must on the time I changed the plan as I went and made adjustment to my needs as I worked on it. I can guess that if you work on it few hours a day, you can finish it in a week or less.
Steps
Step 1
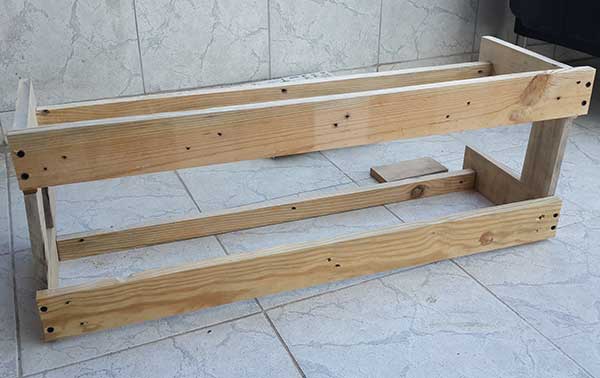
Wine holder -
As you can see from the picture below, it is very basic shape. 2 long woods connected on the sides and 2 wooden columns between 2 set. The front Wood is little height to create an angle (I tried to reach as close as I could 45 degrees.
Whiskey bottle shelve -
Keeping it simple, the idea is the same. Strong long bottom wood, 2 sides and 1 front much narrow wood. The back is either a wall or in this case the wood bed. Screwed to place with 2 screws each side. The shelve itself is glued with a wooden glue.

Step 2
Working area or pour your drink. Created with 3 thick strong wood (pallet wood that I found and toke apart) with support on the sides that connect it to the wine holder. Smoothed and coated with 4-5 layers of varnish for protection from the poor liquid that may spill on it.Step 3
Painting. The back bed that hold it together, the pour area, whiskey bottles shelves are all painting with transparent varnish with minimum of 2 layers. The sides of the wine shelves painted with white (Rust Oleum white) and the front wine shelves are painted with special paint that you can use chalk on it to write (I wrote the purchase date of the bottle but you can write what ever you want, of course).Step 4
Putting it all together. It was a simple task, just used screws to connect it to the back bone (the old bed I found).Conclusions & Remarks
- Measure twice (or three) I already mentioned it (in my other projects) but it worth saying it again. Measure twice even three times to make sure and mark clearly.
- When dealing with liquids When you know the wood may be exposed to liquid you must protect it. So put 2-3 layers and make sure to dry them and look for cracks in the paint between layers and fixing this cracks (if they exist).
- Balance I was sure that the heavy top will make the all stand collapse, so make sure to use a strong wood that can handle such stress and/or secure it to the wall as an extra security measure.